Sunday, September 28, 2008

A Little Bit of Paint

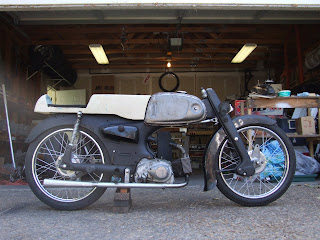
I got busy priming and painting the past couple of weekends. Last weekend, I worked on the gas tank and seat, which got sprayed bright red. This weekend, I added some silver to the main frame, front fork, rear swingarm, and a few small brackets and accessory items.

A few items painted


The last big item that needs paint will be the front fender, which needs a bit more body work to get it ready for silver paint. And of course the side covers, and some more brackets etc. I guess I better make a list!

Just for fun, here's another photo of the rear tire, a IRC NR53, as mounted on a back wheel.


I also spent some time today mocking up an intake manifold. In fact, my mock-up may end up being my final product. After I clean it up and lay on some heat resistant paint, I'll snap a picture.

C'

Wednesday, September 24, 2008

Front Sprockets

As mentioned in the last post, I need to "gear up" the bike in order to see speeds over 52mph, the rating of the bike at 10,000rpm with stock tire and gearing. The slightly taller rear tire will help a little, but I knew I would need to make changes to the sprockets. In stock fashion, the bike uses a 14T front sprocket and a 40T rear sprocket, giving it a final drive of 2.85:1.

I began searching for bigger front sprockets, but found it difficult to find items marked for use on the C100/110 engine. Most sprockets are tagged for XR50s, or CT70s etc. I got lucky the other day and found a Honda Passport (C70) site that gave a listing of other Honda models that used the same sprockets. It included the C100, along with a dozen other small Hondas like the CL70, XR80, ATC70, S65 etc.

So, I started searching for sprockets for some of these other Honda models. I came across Beatrice Cycles ( http://dratv.com/index.html ) which happens to have an excellent breakdown of parts, categorized by model and major component. If you want electrical parts for your ATC110, they've got it. Likewise suspension parts for your Z50.

I searched around the C70 page, and found that they offered 15T, 16T, and 17T front sprockets. I bought one of each, along with a few extra tire tubes (for the red wheels.) Everything arrived at my door within 3 days. I quickly ran out to the garage and confirmed that yes, these sprockets do fit the early pushrod motors.


From L to R: 14T, 15T, 16T, 17T


Based on my gearing calculation spreadsheet, these sprockets should give me a range of speed from 55 to 67mph in 4th gear at 10,000rpm. I plan on building up both the C110 4-speed engine, as well as a 3-speed C100 engine, which has a slightly shorter top gear.

Perhaps I'm spending too much time worried about this one subject, but given the fact Bonneville is at much higher elevation, I wanted to have plenty of options for fiddling with gearing. A few hundred rpm could make a difference, especially when your only dealing with 5.5 to 6hp!

C'

Monday, September 22, 2008

Assembled Wheels, Chopped Tail, and New Tires

Over the past few weeks, I've ordered an assortment of parts for Salty, ranging from NOS Piston kits, to larger front sprockets, to a couple sets of tires. This post will focus on the tires, and their fitment to the bike.

One of the "speed modifications" to this little bike is to gear it up. In stock form, the bike runs a 14-tooth front sprocket, and a 40-tooth rear sprocket, with a 2.25"x17" rear tire. Based on some calculations I've put together, this should put the top speed around 52-53mph at 10,000rpm. Perhaps I'm hugely over estimating the performance of the bike, but I wanted gearing options that would let me run at least 60mph.

One of the easiest solutions is to run a taller rear tire. That isn't a simple matter when it comes to small bike tires, however. I want to keep the tires fairly narrow too, so after much research I found the Michelin Gazelle M62 tire. This is a small motorcycle/moped tire that is speed rated to 82mph. It is available in several sizes, including a 2.25x17 (front) and a 3x17 (rear.)

However...nobody had any of these tires in stock. I talked to several vendors, and ended up having orders sitting around for more than 2 full months, with expected delivery dates getting pushed out further as each week passed by.

So, I researched more and came across the IRC NR53. It is a semi-slick treaded tire, again made for small motorcycles and mopeds. It too is speed rated, and offered in both a 2.25x17 and 2.75x17 size. I placed my order and within days I received one of four tires. I ordered two fronts and two rears. The other three tires are on back order, but hopefully might actually get shipped sometime this year!

I quickly mounted up the 2.75x17 rear tire to the rear wheel assembly I had put together. I'll call these the "chrome wheels" since I'm using a set of stock wheel rims with pretty decent chrome. I knew there could be some clearance issues under the rear fender with this wider rear tire, so I chucked it under the bike to see how bad it would be.

As it happens, I also took an opportunity to trim the rear fender. As the rules state, there can be no rear fender extending past the centerline of the rear wheel, but the seat can essentially act as the rear fender, which mine will. Sorta. The exact rules reads as:

...
5.F. FRONT AND REAR FENDERS
Front and rear fenders may be removed. Generic, replacement type
fenders may be substituted. Rear fenders may not extend beyond
the centerline of the front or rear axle. Elongated seat may act as
rear fender and is subject to scrutineering.
...

So, I grabbed the cutting wheel and shortened the rear fender. Don't worry, lovers of originality, as I have several stock rear fenders sitting on the shelf from parts bikes ready to go on should I ever want to take it back to the original full-fendered look.


Rear tire mounted up, and rear fender shortened per rules:


As it sits, I barely rub when I'm fully loaded on the bike, at its lowest settings. It is barely rubbing on the edges of the tire. With just a little "spreading" of the rear fender - what's left of it - I should be able to go off-roading without rubbing.

In preparation for the other set of tires arriving, I put together a second full set of wheel assemblies this past weekend. We'll call these the "red wheels" since I painted them red to match up with the red tank and seat (more on that later.)

Second set of wheel assemblies, sittin' pretty waiting for fresh tires


Tommorow, I'll post about my newly found set of front sprockets.

C'

Friday, September 12, 2008

Leathers!

One thing I needed to find before any running with this bike, was a set of suitable leathers, boots, and gloves. Per the rules, and general "rule of thumb for Bonneville," I looked for all leather construction, without much perforations across the front and in other critical areas. This seems to be the key, as many track day leathers use perforated material across the chest, and under the arms for ventilation. I didn't really need to pickup anything quite this soon, but I've been keeping an eye out for items locally.

As it turns out, I came across a set that seem to fit the bill, for a good price. They are a two-piece set of Sinsalo leathers, full leather construction, dual zippers at the waist, that fit me well. A tad snug in the legs/knees, but I am comfortable while in the tucked position. They also came with a set of full leather boots and gloves, both of which fit perfectly.

Captain America Returns!


Fully Tucked and Ready for Speed


All I need now is a suitably rated Helmet. My SA2005 Helmet I use for the Formula Vee is not M rated, and has a much smaller field of vision. So the search begins for a M2005 helmet...

C'

Tuesday, September 2, 2008

Building an Exhaust

One of the items I still needed to build was an exhaust system. Per the rules, the exhaust couldn't extend past the rear tire, and it's opening couldn't be directed at the rider, or the salt surface. Unlike 2-strokers, you don't have to design an expansion chamber to produce power at a certain RPM for a 4-stroke. However, there are still some basic calculations that can be run to optimize length and diameter, based on RPM. Also, stepped designs can be taken advantage of.

These calculations called out for a main header pipe roughly 18-inches in length, and a diameter matching that of the stock header pipe. So I grabbed a spare header pipe, added a few inches to it, and came up with my 18-inches exhaust length. Unfortunately, this ended the exhaust just ahead of my foot, and looked rather incomplete.

So taking advantage of a stepped design, I used a piece of larger diameter pipe to bring the exhaust back behind my foot, then built a simple megaphone that attached to the end. The megaphone was rather fun to build, as I simply cut out a pie shape wedge from a piece of 2 inch pipe, then shaped the leftover piece into the cone shape, welding along the seam.

In the end, I'm left with a main header pipe to match up with my RPM zone, that is stepped up and mated to a megaphone for looks. a simple hanger is attached to the front swingarm bolt. The entire thing will get coated in trusty bbq paint, and possibly wrapped in header wrap. A few photos are shown below.

Proportions fit the profile of the bike pretty well


The header pipe actually runs inside the "stepped-up" section of pipe about 6 inches, for a total primary length of 18 inches.


Megaphone was "squashed" to produce an oval section. I might give the tip a slight slash cut.


Chris H.